Simple Guide To Laying A Gravel Garden Patio

There’s nothing quite like spending time with friends and family on a warm summer’s day on your own patio - the perfect spot to entertain or dine out or simply retreat to after a busy day at work.
Whilst traditional patio surfaces such as poured concrete, flagstones, timber decking and paving remain popular surfacing options, the material costs and construction challenges mean garden lovers across the country have started choosing gravel patios as a practical and affordable solution.
What is a gravel patio?
A gravel patio is a ground-level outdoor space that can be attached or detached from a home. Patios often feature outdoor furniture such as a table and chairs, however they can be designed to include fire pits, barbeques or bespoke planting areas.
Gravel patios utilise loose gravel for the surface. This creates a finish that is both beautiful and easy to maintain.
Gravel patio benefits
-
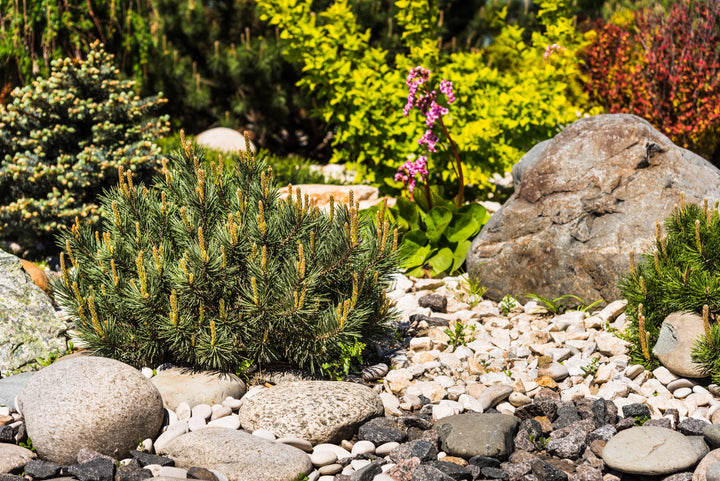
Attractive - gravel patios look stunning and compliment the natural beauty of any style of garden - both contemporary or traditional, with a wide selection of gravel colours and sizes to choose from.
-
Easy to lay – gravel is an easy material to lay due to its size compared with alternative patio surfaces such as decking or concrete paving.
-
Economical – gravel patios are more affordable than other patio surfacing solutions and do not require the help of a landscaping professional to create.
-
Drainage – gravel surfaces are porous and provide natural drainage, leaving your gravel patio puddle free.
-
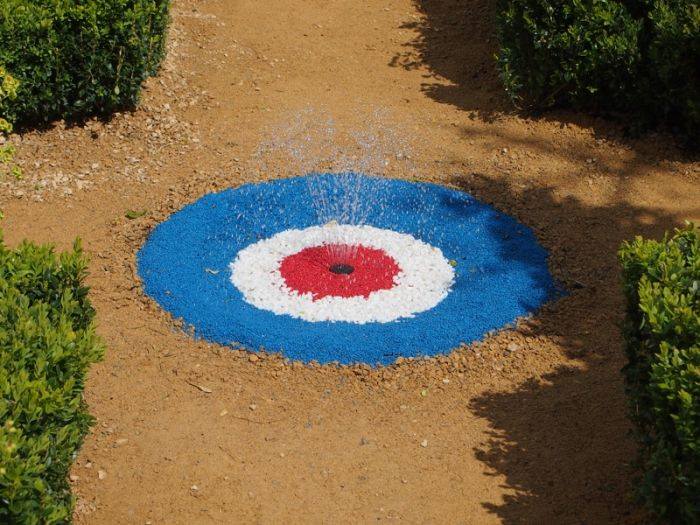
Versatility – gravel can be used for a wide variety of surfaces giving you limitless design opportunities, including connecting a natural gravel pathway to your patio, and there are countless colours available, from luxurious Polar White Marble to stylish Silver Blue Granite.

How to lay a gravel patio
Gravel patio project summary
1. Choose your decorative gravel.
2. Mark out the area for your gravel patio.
3. Excavate the area for your gravel patio to at least 5 inches deep.
4. Prepare any edging or border detail.
5. Compact the base and add a layer of Type 1 MOT crushed limestone.
6. Add a layer of weed prevention membrane.
7. Top up with your decorative gravel of choice.
Tools and materials required
-
High-quality decorative gravel, for a beautiful gravel patio surface finish.
-
MOT Type 1 levelling material (crushed limestone down to dust), for a stable base.
-
Spade for shovelling dirt, debris and for placing the decorative gravel.
-
Weed Prevention Membrane, for water drainage and weed resistance.
-
Wheelbarrow for moving debris and gravel.
-
Measuring tape to measure the size of your patio area as well as calculate the required quantity of gravel.
-
Garden rake for levelling off the finished gravel patio surface.
-
Garden hose/string & wooden stakes for marking out the gravel patio area.
-
Decorative boulders, for an extra stylish gravel patio border (optional).
Step 1: Choose your gravel

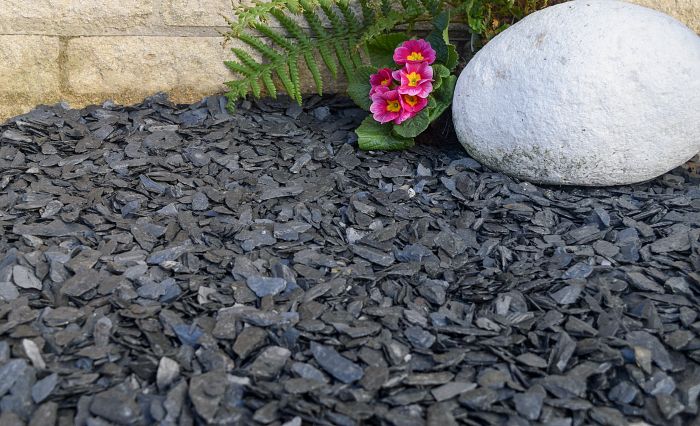
One of the advantages of choosing gravel for your patio is that there is an extensive range of various colours and sizes available to match any outdoor area, from lighter, brighter gravel colour such as the stunning Dove Grey Limestone Gravel 14-20mm to the beautiful cream Cotswold Buff Gravel 20mm.
Alternatively, for a more contemporary finish, Silver Blue Granite Gravel 14mm features tones of blue with attractive silver flecks throughout.
If you’re seeking to create a more elegant design for your gravel patio, Polar White Marble 20mm is a striking white and angular gravel that provides a bright, clean look that really brings out the natural colour of surrounding plants and flowers.
But don’t let us choose for you!
Decorative Aggregates stocks a range of beautiful aggregates and gravels and there are dozens of stunning colours to choose from. Any gravel colour will make your brand-new patio look truly amazing.
Step 2: Identify and mark out the area you wish to create your gravel patio
Before getting your hands muddy, you will first need to decide on where you’re going to lay your gravel patio.
Consider the versatility of gravel as a material, and whether or not you want to weave in existing garden pathways to your gravel patio. Also, consider whether you want your patio to connect to your home or be a separate area within your garden.
If you’re thinking about building your patio away from the walls of your home, choose an area that is as flat as possible as this will make laying the gravel patio base much easier.
Additionally, choosing an area that is on a hill or a raised area will allow you to observe the natural beauty of your garden during the time spent on your new gravel patio.
Once you have identified the area for your gravel patio, it is time to mark out the area of your patio. We recommend using rope, string, marking spray or even a garden hose. Stakes can be dug into existing turf to help keep the outline shape intact for excavating.
Step 3: Dig the area for your gravel patio

Now that you have decided on where you would like your gravel patio to be, you will want to remove topsoil using a spade to the desired depth. If you intend on laying a sub-layer for extra stability, you should excavate to a depth of at least 5 inches (13 cm).
Ensure the base of your gravel patio is flat and compacted. Softer areas may require digging out and reinstating with MOT Type 1. For larger patios, compacting the base layer may require a roller.
A square edge spade is recommended as this will ensure the sides of your gravel patio are straight and even.
Step 4: Prepare edging or a border for your gravel patio
At this stage of building a gravel patio, you will need to decide on edging.
As gravel is a loose material, having a border is important as a compact barrier will keep the gravel within the patio area reducing time spent maintaining the area as furniture and foot traffic may spread the gravel and cause it to spill over.
There are several types of edging to choose from including timber, bricks and stone. If you’re looking to stick to a strict budget, bamboo or spiked timber border edging is an ideal choice for separating your patio from turf and for keeping the gravel enclosed.
Step 5: Prepare the gravel patio sub base

If you expect your gravel patio will be receiving a large amount of foot traffic or any outdoor furniture, it is strongly recommended that you prepare a sub base for added stability using MOT Type 1.
Lay the crushed levelling material to a depth of around 10 cm or 4 inches and ensure it is spread evenly across the base of your excavated patio area.
Always make sure the Type 1 is well compacted to avoid an uneven gravelled surface once the final material is applied and ensure at least 2-3cm is left empty to provide space for the decorative gravel.
Step 6: Add a weed-resistant membrane to your gravel patio base

Once the Type 1 MOT is prepared and compacted, it is time to add a layer of weed prevention membrane. Cut the sheet to your desired shape and place it on top of your compacted MOT Type 1.
Adding a layer of weed-resistant membrane to your gravel patio base is highly recommended as this will ensure the gravel does not mix with the crushed limestone or soil beneath, and it will prevent weeds from protruding through the finished gravelled patio surface. This will also improve drainage.
Step 7: Add your decorative gravel
Once your weed prevention membrane has been laid down across the sub-base material, it’s finally time to add your decorative gravel.
The gravel can be easily and quickly shovelled onto the membrane and evenly spread with a garden rake.
FAQs
How do you maintain a gravel patio?
Gravel patios have low maintenance needs and do not require regular cleaning. If you find your gravelled surface getting dirty, a simple rinse with a pressurised power washer for 30-60 seconds will do the trick!
If you need to remove fallen leaves from your gravel, simply give the gravel a gentle sweep with a soft broom.
To ensure your gravel patio requires minimal maintenance, make sure to lay your gravel onto a weed prevention membrane.
Read more about how to maintain gravel in our ultimate guide to gravel.
How much does a gravel patio cost?
Gravel patios are beautiful yet inexpensive alternatives to the more costly timber and paved counterparts. To calculate the cost of a gravel patio, you can use our easy-to-use gravel calculator to quickly calculate the quantity of material required for your project by entering the size of your patio area.
The use of a subbase, weed prevention membrane and the size of your gravel patio area will also contribute to the cost.
Can gravel patios be used in small gardens?
Yes, gravel patios can be used in smaller gardens and they look stunning no matter the size!
However, as a rule of thumb, we recommend having space for a patio that is at least 3m x 3m so that you may add the necessary furniture or potted plants.
How deep should a gravel patio be?
Your gravel patio should be at least 5 inches (or 13 cm) deep. This is to allow room for a compacted 10cm crushed stone base and at least 3 cm for the final layer of decorative gravel.
How much gravel do I need for my patio?
To calculate how much gravel you need for your patio, we’ve put together a helpful gravel calculator. Simply enter the length, width and depth of your area and the tool will calculate how many bags or bulk bags you need - it’s that easy!