How to Create and Maintain A Gravel Garden
For an incredibly beautiful outdoor feature that’s easy to maintain, we’d recommend building a gravel garden.
Whether you're a green-fingered experienced landscaper or you’re just starting out in your garden, making a gravel garden is really simple.
What is a gravel garden?
Gravel gardens are an attractive choice for outside areas and breathe life into any landscape. Created from a variety of decorative crushed stones, creating a gravel garden is not only a fun project, but it is also a sure way to make your outdoor area really stand out.
Gravel can be used as mulch around plants, or for patios, pathways, driveways, rockeries, decorative borders and edging. Gravel looks effortlessly stylish, and makes it easy to achieve beautiful, yet practical, outside space.
Gravel gardens are popular because they’re relatively inexpensive compared to fixed surfaces.
Best of all, they don’t need expert installation - anyone can lay a gravel surface themselves and by the end of this article you will be ready to transform your garden.
Gravel garden benefits
-
Just as beautiful and stunning as a traditional perennial garden, but with significantly less maintenance.
-
It allows for a sustainable plant community that can thrive with natural rainfall.
-
Turf holds water, so for every square metre of grass you replace with gravel, you can save thousands of litres of water every year.
-
Cheaper to install than paving and turf.
-
Gravel can blend well into any setting.
-
A low-maintenance garden option; simply occasional raking and gravel top ups.
-
Great for security - produces a crunchy sound under foot when intruders approach a house.
How to design a gravel garden
1. Choose your gravel
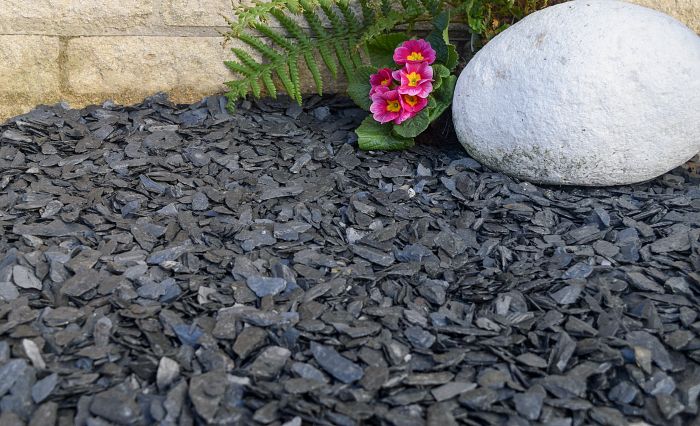
Gravel is supposed to blend in. When you choose a gravel colour, it’s best to match or blend this to your house paint or brick colour, and avoid a clashing tone. Light shades of gravel look stunning next to white-painted brick, and versatile grey gravel complements blacks and browns particularly well.
White gravel provides an impressive wow factor. 20mm White Marble highlights plants beautifully and gives a bright and modern feel.
The stunning Silver Blue Granite Gravel isn’t your everyday gravel, and adds a sparkle to any landscaping area. So if you’re looking for a unique, contemporary feel in your garden, Cornish Silver is the ultimate choice.
You can browse all of our gravel options here, so feel free to get innovative with your decorative garden designs and create something truly special for you.

2. Choose an area for your gravel garden
Firstly, select an area in your garden that gets some sun and has fairly good soil drainage already. It’s best to remove any existing herbaceous vegetation, however if there are existing trees or shrubs there, they can be incorporated into your gravel garden design.
If you don’t plan on creating a full gravel garden, decide on the shape of your area and mark it out - including the areas for planting - the most popular designs tend to be fluid in shape. Also, it’s important to consider that plants need to spread out as they grow - so make sure to leave plenty of room between plants.
3. Select edging for your gravel garden
If you don't plan on using the whole yard to create your gravel garden, and your gravel garden is part of a larger outdoor area, it’s best to include an edging. Solid borders look incredible around the perimeter of the gravel garden, and really help your gravel feature stand out.
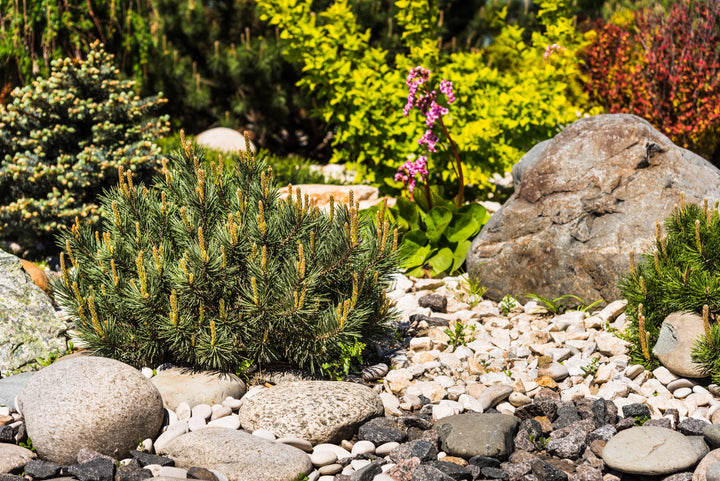
Medium to large sized boulders and rockery stones can be used to provide a natural edging to the gravel garden, framing the edge in a highly decorative fashion. You can find a stunning selection in our pebbles and cobbles section or in our boulders and rockery section. It’s a good idea to ensure your border is tall enough to keep in a few inches of gravel that is laid on top of the soil to make sure your gravel remains within your chosen area.
4. Select your plants
The foliage and plants you choose for a gravel garden are all down to personal preference. However, consider leaf shapes and textures when you’re choosing your plants.
Adding silver-foliage plants gives an exotic essence and resembles hotter climates. Gravel gardens lend themselves to mediterranean-style drought-tolerant planting; plants such as lavender, rock rose, euphorbias and phlomis work really well and the visiting insects get plenty of nectar and pollen.
Gravel gardens allow for a variety of beautiful flower colours; you can even choose flowers that change colour multiple times through the seasons - constantly refreshing your garden! These range from subtle, gentler shades to explosions of colour at other times of the year.
According to RHS, here are just a few examples of some of the beautiful plants ideal for a gravel garden:
-
Allium
-
Colchicum
-
Ceanothus
-
Cistus
-
Cordyline
-
Cytisus
-
Hypericum
-
Yucca
-
Echinops
-
Eryngium
-
Euphorbia

How to make a gravel garden
So, how do you build your gravel garden?
Making a gravel garden doesn’t require expert landscapers, in fact, you can lay a gravel garden yourself!
1. In the design process, you will have measured out the area of your gravel garden. Once you’re happy with the shape, mark out the final area for your garden; we’d recommend doing this with rope, string or line-marking paint.
Make sure you calculate exactly how much gravel you will need to order, to prevent coming up short and delaying your project. Our gravel calculator does the maths for you.
2. Next up, it’s time to do some digging. You’ll need to remove the topsoil within your marked out area to form a trench. It’s best to dig this to a depth of around 4 inches, and use a square edge spade to ensure the sides of the trench are even. When you’ve dug the trench, you need to smooth the base with a rake, and compact it using a tamper or other flattening tool.
3. A border will help to keep the gravel neatly contained. So you could consider adding metal edging, bricks, wood or stone borders. These should cover the edge of the gravel garden.
4. A very simple but very important step, is to line the trench with crushed stone. This rock base layer should be level, and about 10cm of hardcore. You’ll need to make sure the crushed stone is compacted with either a sledge hammer or plate compactor, (you can hire one of these from a DIY shop).
5. Preventing weeds from sprouting into your gravel garden requires a weed resistant membrane. We’d recommend laying a permeable membrane between the base of the garden and the top layer of gravel.
6. The final stage is to spread your gravel on top of the membrane. Make sure there’s even coverage and you lay enough for a depth of at least 3cm. Simply shovel the gravel on and then distribute with a rake.

How to maintain a gravel garden
The great news is, it doesn’t take much effort to keep your gravel garden in fantastic condition.
Here are a few of our top tips:
1. Unless your garden is far from neighbouring trees, some stray leaves may fall onto your gravel garden. You can simply use a leaf blower (on its lowest setting), or rake away any stray leaves from the garden.
2. A weed resistant membrane will prevent the majority of weeds from rearing their head. However, you may still get a few stray weeds that you can just pull out when needed.
3. Over a few months or years, the gravel may thin, and create sparse areas. Top-up the gravel when necessary to fill in the holes (it’s a great idea to buy an extra bag or two when you create your garden so this matches). Then, you can rake the gravels in rows.
4. Keep your gravel garden plants well-watered for their first season.
5. It can be a faff to dig through your gravel and membrane to add new plants. However, if you want a refresh and to add a new lease of life, you can add a potted plant or two.

FAQs
How much gravel do I need?
We’ve put together a handy gravel calculator to do the maths for you. Identifying how much gravel you need is important, so you don’t run out or have unnecessary waste.
Enter the length, width and depth of your area and the calculator will output the approximate volume of gravel you’ll need.
If you have any questions, feel free to call us for advice on 01629 630256.
How do I choose where to build my gravel garden?
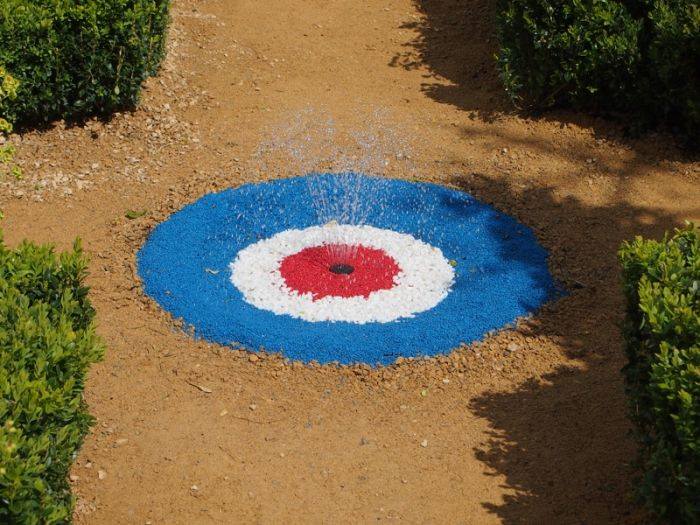
If you want to add plenty of plants and flowers to your gravel garden, choose an area in your garden that gets some sun and has fairly good soil drainage. However, you can also create gravel gardens in a shady area - instead of plants, a central, eye catching water feature looks stunning.
What should I lay under gravel?
We’d always recommend laying a weed resistant membrane under your gravel. This helps to prevent weeds, whilst being permeable to water and air, and it’s extremely easy to use.
Best of all, the membrane provides long-term protection from weeds so you don’t need to use unnatural chemicals.
Is gravel good for gardens?
A gravel garden is an ideal solution for a low maintenance garden. A gravel garden is also environmentally friendly, helping to save thousands of litres of water every year, compared to turf.
Not only that, but it lends itself perfectly to Mediterranean-style drought-tolerant planting, allowing for plenty of pollen and nectar, creating an insect and bee-friendly environment.
How deep should my gravel garden be?
If you are using a 10mm gravel aggregate, you should lay this at a depth of 30-40mm. If you choose to use a 20mm aggregate, this should be laid at least 40-50mm deep. For more information, read our ultimate guide to gravel.


